 Your little one is excited to start learning the guitar! You’re excited for them too. You even bought them their own personal-sized guitar so it would be easy for them to play. You’ve also been looking up guitar lessons in Houston or wherever you live to find them the perfect teacher. However, after buying your child their own guitar, you have both been surprised by the sound the guitar has made with the strings it came with. Or maybe you’ve dusted off your old guitar or bought a used one from a neighbor. If so, it’s high-time you change the strings, which is probably what led you to this blog. But how change out guitar strings? Is it dangerous? Here’s how you can safely and correctly restring a guitar.
What you need to change strings
Now that you have the best guitar for your kid who’s just starting out, you might encounter some difficulties. Restringing your guitar can be difficult on your first try. The pegs that hold your guitar strings in place can be especially difficult to remove to get your strings off. Here is what you need to easily and efficiently change out your old strings for new ones.
1. Tools
Most guitars will come with a string winder tool with a type of plier tool on the end. If your guitar doesn’t have one, you can always find a more specific tool at your local music store. You also need a pair of wire cutters or piano wire cutters.
2. New strings
You can’t restring a guitar without a set of new strings! You can buy new strings for your guitar online or again, at your local music shop or guitar store. If you are curious about the different types of strings you can buy for your guitar, check out our blog here.
How to correctly change guitar strings
- Slacken the guitar strings. Twist the tuning pegs (or machine heads) on the headstock so that the guitar strings begin to loosen up.
- Cut the strings. Once each string is loosened up, take your wire cutters and cut the strings in the middle of the guitar. You, the parent, should do this. The danger with changing guitar strings comes with handling cut wire. Carefully unwind each tuning peg’s strings, gather all the strings on the half side of the headstock, and wind the cut wire up tightly in a circle. Loop the strings into a small knot to keep the wires from flailing out and cutting anyone.
- Pull the pegs out of the bridge. You may need to loosen them up if they feel a bit stiff. Use the tool on the end of your string winder, or gently use a pair of pliers to remove the pegs. Collect the other half of the cut guitar strings and carefully wind them up and discard them.
- Slide the ball end of the guitar string into the hole (where the peg goes). Make sure the peg is lined up, so the groove in the peg faces the neck of the guitar. Gently pull up on the guitar string as you push the peg in, and be careful not to put any bend or kink in the string.
- Repeat this action for each of the strings of the guitar. Again, be careful not to put any dent in the strings, or else it won’t sound correct when you’re all finished and play it.
- Get all holes in tuning pegs to face the bridge. This will make it easier to restring. If they’re not, turn the tuning pegs around, so the holes face the direction of the string.
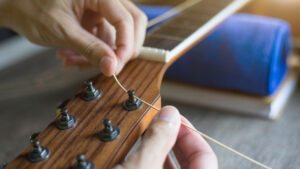
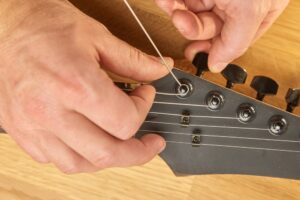
- Feed the guitar strings through the tuning peg holes. Hold the string taut against the neck and carefully wind the string by turning the tuning peg. Some guitar instructors will suggest you use the string to measure one and a half tuning pegs of extra length, pull that length back, and then wind the string until the length has been wrapped around the peg. Do this for each of the strings with each of the correlated tuning pegs. For the B and high E string, you’ll want to measure two tuning peg lengths. Ensure that as you wind the string on the tuning peg, the string is neatly wrapped, not crossing over other layers of string. Pluck the string to make sure that there is no slack in it and that it carries a tune (even if it’s out of tune at the moment).
- Cut the extra string. Once all your strings have been restrung with the correct tuning peg, you can cut the extra string that sticks out from the tuning peg. Cut it close to the tuning peg so that the extra wire won’t poke your child when they play.
- Tune your guitar. Now that your guitar is restrung, you’ll want to get your tuner out and tune it up! Then you can get back to practicing.
A fail-proof way to change guitar strings
It’s one thing to read a blog about changing guitar strings. It’s another to actually do it. If you or your child still isn’t sure if you’re changing the strings on your guitar correctly, you can always ask a Houston guitar teacher. He or she will help your child change the strings on their guitar safely and correctly and build their confidence so they will be able to adjust their guitar’s strings on their own.
To find a friendly and professional teacher, search through our database to find a teacher near you. At Lessons In Your Home, we hire the best of the best, and we thoroughly vet all of our instructors. They can either come to your home to teach or can also provide online music lessons. Our virtual music lessons are taught by local music teachers who plan their lessons to suit your child. Contact us today to find an instructor your child will remember for their lifetime.